Friday, December 20, 2013

Pottery Shop Dressed and Ready to Party!


The pottery shop and studio is 99% finished. As in real life, there is always some tweaking to be done. Here is the Shadyside Potter as she stands today. (Click on the photos for a larger view.) The driveway has been completed, stepping stones made from terracotta air dry clay have been installed, the turf has been roughed up to show some wear from foot traffic, and tea leaves and coffee grounds now masquerade as dirt and mulch.
     The kiln still has a bit of a shine after several sprayed coats of matte-finish artist's medium. I've accepted that it is what it is and won't fiddle with it any more.

I discovered that there is a subtle difference in the shade and texture of tea leaves. Earl Grey has a slightly larger cut and is lighter in color than English Breakfast tea. Coffee grounds are more granular and are much darker than either of the teas. I used Earl Grey for the mulch around the stepping stones, coffee grounds for mulch under the bushes and trees, and a combination of the two teas with a touch of coffee grounds next to the driveway. For the path between the door and the kiln, I scraped off some of the grass and sprinkled a mix of all three mulches to indicate some footworn spots.

On the shop side of the building, there is less going on. After this photo was taken, I added a couple more pots on the ground next to the porch. The stepping stones here are also made from terracotta air dry clay. (Note to self: that bit of stone wall is crying out for a ceramic wall sculpture.)

The photo in the next picture was the inspiration for the driveway. I went to Walmart and bought two dozen eggs just for the cartons; the grocery store we usually use offers only plastic foam trays. The arrow is pointing to an inscription in the stepping stone. While the clay was wet, I used a pin to scratch KB 2013 into it. :) 
     The tea leaves, coffee grounds and loose turf were sprinkled onto diluted white glue that was brushed on the base. The top layers didn't touch the glue and had a tendency to blow around. I hit them with a good dose of hair spray, which keeps them in place while remaining invisible. Another part of the 1% tweaking that needs to be done is aging the stepping stones. They look uncomfortably new. 

Inside the shop, I added some posters and signs for a bit of color. I copied them from the internet and printed them on matte-finish photo paper.

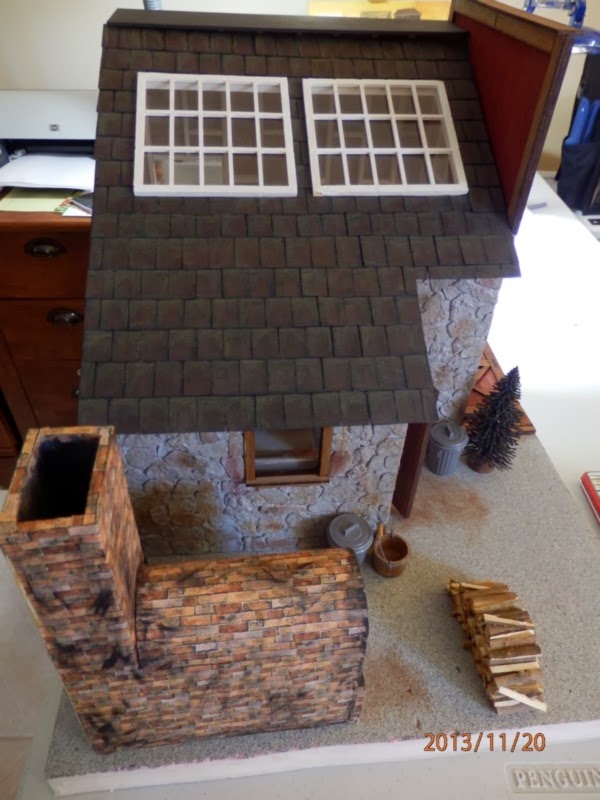
I see two more spaces for ceramic wall art -- above the door and below the shelf.  I like this shot because it shows the skylight in the studio area.

One sign is posted in the studio. It reads: Keep Calm and Throw Something. This photo shows the back of the garage doors, which are perfectly flat. I faked the boards and cross bars by drawing them with a woodburning tool and doing a bit of shading with the paint to mimic the front sides.

Okay, so maybe the pottery is closer to 95% than 99% complete. There is still the potter himself or herself to make. Stay tuned!

Sunday, December 8, 2013

Pottery Shop Landscaping Challenges


Before we get to the landscaping, thought you'd like to see this project as it's coming together. The roof of the pottery shop has been removed in these photos; it's made to be removed for easy viewing. In the background is the Beacon Hill. The general contractor is wondering when I'll get over there. This was supposed to be the winter of the Beacon Hill, but the pottery shop hollered louder.

The kiln is finished but for one step. Do you see the slight glare on the curved of the kiln? I painted the kiln with satin finish polyacrylic. Mistake. Kiln bricks are not supposed to be glazed. I've tried to dull the finish with washes of gray and ivory acrylic. It helps a little but not enough. I'm not sure what the step will be, so I'm moving on to the landscaping while I ponder. One thought is to powder some gray or black chalk or charcoal and gently rub it on with a fingertip. Actually, that's the only thought at the moment. Suggestions welcome!

There are some challenges with the landscaping. The lovely grass sheets have to be cut and fitted around the building and kiln. The sheets have a directional grain. The grain doesn't always run in the direction it should, which results in obvious breaks between sections. Not realistic at all. If you look at the strip to the left of the garage door you'll see what I mean.

Also, I haven't figured out how I'm going to make the driveway and walkway to the steps. I don't like the painted stone-finish paint. Another issue is the too-clean lines between grass and man made areas. The pads by the doors are bits of a plastic foam egg carton. They look like concrete pads that might lead to strips of concrete with grass between. 

One thought is to make some stones from left over terra cotta air dry clay, paint them gray and then put some white on as if they've been whitewashed, and line the driveway edges with them. I have some crumbles of green/brown flocking/foliage materials that can be put between them. If you click the next photo to enlarge, you can see a bit of the crumbly material close to the right side of the garage door. It blends well with the grass.

I had three of the oblong bushes like the one in front of the porch but needed smaller ones near the corner of the building. I cut one of the oblongs in two and glued some of the crumbles on the raw edges. I like the result.  I've saved some used coffee grounds and tea leaves for dirt and mulch. That's what is in the containers in the foreground.

Another challenge is how to indicate wear. The grass would be worn in paths from the driveway to the door and from the door to the kiln. Stepping stones? Indicate matted grass with glue & stain brownish? Or? Again, suggestions welcome!

Back to head scratching!


Thursday, December 5, 2013

Kiln Nearly Finished


An iron frame, little paint, a little Spackle chinking, and the kiln is nearly finished. The bracing is necessary because the bricks expand unevenly from the great heat inside. The "iron" here is actually thin strips of 1/32" basswood. The expansion causes cracks in the wall that have to be chinked before each firing session to prevent heat loss. In real life, the clay chinking also gets fired, gets loose, and need to be replaced. In this case, the air dry clay caused some separations and one lovely crack.

The kiln is sitting on a "concrete" base made from part of a foam plastic egg carton. Love those egg cartons, both plastic and paper. The inside of the oven is the original brick-painted paper. It is not easily seen and mimics the outside enough that it works for me. I wasn't too excited about trying to paint bricks inside, especially since I'd glued the pots inside. 

The base will be set down a bit when installed. In these photos it is sitting on top of the grass sheets. Next step: installing the grass.

Tuesday, December 3, 2013

The incredible shrinking kiln


Well, I suppose it's really not all that incredible. I should have realized that air dry clay would shrink as it dried, despite being glued to the base. As it turns out, all is not lost. In fact, Lloyd says it adds a touch of realism to the kiln, as the brickwork suffers from the intense internal heat and is in need of regular patching.

The worst damage was the top of the oven. The two panels pulled apart, leaving a gap nearly the width of a course of bricks.


The separations on the side of the chimney resulted from the horizontal lines being a little too deep. What was one panel became three. The crack on the side of the oven gave me reason to pay attention to the need for some iron bracing. It is an integral part of most real brick kilns. I'd hoped to get away without it, but in the interest of realism, I see some ironwork on the horizon.

The back side of the chimney didn't fare well, but the bracing, plus painting and patching, should take care of it.

The only repair made was the addition of a row of bricks in the biggest gap. When this dries, it will be time to add some bracing and shading.

While that's drying, the landscaping is demanding attention.

Friday, November 29, 2013

Rebuilding the Kiln


The brick-printed paper on the kiln has been bugging me. It didn't measure up to the level of realism I've been aiming for, so today I pulled it off and replaced it with a dimensional brick veneer made from terracotta colored air-dry clay. The paper peeled off rather easily as it had been stuck on with rubber cement.

I was able to use the paper as templates to cut the clay. I rolled the clay to about the thickness of the "real" bricks I had on hand.

I made the brick veneer in slabs. A skinny stick cut lengthwise was used as a guide for making the rows. Its squared end (tapered with an emery board to a chisel edge) was used to make the brick indentations. The bricks are a bit larger than the "real" bricks in the stack (which will be used to seal the kiln when ready to fire), but my claim is that they are hand made and subject to a few irregularities. This was much faster than gluing individual bricks.

A generous amount of Aileen's Tacky Glue on the surface holds the slabs in place. There are a few irregularities where the slabs meet, but I believe they will be minimized when the bricks are painted to match the stacked bricks.

Meanwhile, the manikin I bought to use as a reference for making the potter got out of his box and started playing around in the pot shop.

 Now on to something else while the clay dries! 

Sunday, November 24, 2013

Big Things and Little things


The parchment hinges seem to be an okay fix. The one of the left swings freely. The hinge on the right door came loose at the top. It has been reglued and taped to dry. It will be fine, too.

 While waiting for the glue to dry, I printed out an illustration of potter's tools and made a few. Here they are shown on top of the printout. The box was made from popsicle sticks and stained. The circle at top left with the black blobs is supposed to be a yellow sponge. The blobs are silver scrapers cut from aluminum foil. (Printer cartridge needs to be changed.) I'm going to make some sponges out of Fimo.

If you enlarge the picture, you'll see that the tools are a bit rough. In real life, they look just fine. And glued on the bottom shelf, it will be difficult to see how crude they really are. The tools will be glued in the box. 


Will be heading to Michael's this afternoon to get the materials to make the potter while waiting for the landscaping materials to arrive. 

Friday, November 22, 2013

Doors Hanging


The big garage doors were originally glued ajar. They popped off during the time of great upheaval. I want them to be able to open and close. The questions was: how to hinge?

Not enough room for pin hinging. Pieces already glued, so unable to use tyvek or ribbon for hinging. What would be thin enough to be nearly invisible yet crisp enough to take a knife edge fold and strong enough to withstand some flexing back and forth? How about parchment paper, the kind on hand in the kitchen?

I cut two thin strips, folded them lengthwise, and glued one half to the hinge side of each door. You're looking at the outside of the door on the left and the inside of the door on the right. When I put this together, I didn't feel like making braces for the inside, so I drew them and then used a wood burning tool to outline them before painting. The colors are closer together in real life. The table lamp faded the one on the right.

The first step was to glue one side of the fold to the edge of each door, as you see here.

After the glue was well dried, I added some masking tape to the loose edge, put on glue with a toothpick, and slid the doors into place. The masking tape is on the inside, holding them in place. When the glue dries and the masking tape is removed, we'll see how well this worked.

I thought about using tyvek, which is about the same thickness as the parchment, but I was afraid the slick plastic surface would not adhere well to the wooden doors. The Aileen's Tacky Glue that I used soaked into the parchment a bit, and I know it holds well on wood, so I think this will work just fine.

Today I ordered some grass and other landscape materials this morning. The too flat and pristine ground is bugging me almost as much as the brick-print paper on the kiln. *sigh*

Thursday, November 21, 2013

Weathered Roof & Stacked Kiln

Work on the pottery shop is hopping all over the place. The roof has been weathered. I used Caran d'Ache watercolor pencils with a damp brush to blend the colors. Also note the smaller logs in the woodpile. They look much more to scale now.

A couple dozen new pots arrived yesterday. Some are lined up below the porch. Some have been painted with gesso to resemble unfired glaze. 

The pots to be fired have been stacked in the kiln.  

Now the landscaping is bugging me. It is finished with a stone-look spray made to resemble pea gravel. I don't believe this little stone studio would have such a pristine setting. Do I want to add some rough grass and dirt? Stay tuned!

Monday, November 18, 2013

Back to the Workshop

The pottery shop, that is. When we experienced the leaking roof earlier this year, the pottery shop was in the condo. It didn't suffer direct damage from the water, but the handling by painters and others didn't help it any. When I made the pot shop for the Greenleaf contest, I didn't quite get finished. The other day I decided to do the rehab and add the finishing touches.

A lot of the contents were glued in place, but a few pots fell out and were lost or broken. The big doors were broken off but not damaged. One of the doors was missing for several weeks and turned up packed with real life kitchen stuff by the idiot cleaning service. (click on the photos to see details)


The kiln suffered more from humidity than anything else, I think. It is made of foam core covered with brick-printed paper that pulled loose. I can't remember what kind of glue I used originally. I used rubber cement to fix it. I've ordered some more pots to load inside the kiln. I'll post a photo of the renewed kiln when the pots arrive. (I'm not sure why the King Cake babies are lying in a heap. They don't belong here at all.)

The back didn't look quite as bad. One part of the removable roof needed a new brace, and the whole thing got a good dusting with a soft brush and canned air. 

I made a new table for the display/sale room. The middle of the room was crying for more merchandise. The pot on the top is one that has a face peering out the side. 

After cleaning out the dust, I dry-brushed some ivory acrylic here and there to simulate clay dust.  

Another small adjustment is the wood pile. The original logs are on the left. I used the Easy Cutter to break them down into smaller pieces. They're much closer to scale now. 

Saturday, August 17, 2013

Haunted Hangout Finished 4 - Reading and Pet Rooms

The photos of the finished Haunted Hangout appear in four entries.
Haunted Hangout Finished 1 - The Outside & Meet the Skeletons
Haunted Hangout Finished 2 - Outside Details & Attic
Haunted Hangout Finished 3 - Parlor and Game Rooms
Haunted Hangout Finished 4 - Reading and Pet Rooms


The reading room has a shelf full of skeleton treasures.

I'm not sure what is kept in this old metal cabinet. The hinges were hinky, so I glued all of the doors closed. I'm sure that's not a problem for the ghosts, who can reach right through the sides.

If' I'd realized this was to become a reading room, I probably would have included books in this hutch, but as the house evolved, the need for a kitchen faded. Never the less, it adds color and energy to the room and offers a place to store various herbs in bulk on the bottom shelf.

Talk about a plan evolving -- this was the stove room until a day or so ago when the rat cage moved in. Now it's the animal room. Hey, whatever!

The squashed pumpkin in the corner is wired for electricity, but since I can't imagine ever doing another seasonal house, I tucked it in here.

This flower display was a 2-minute brainstorm. This part of the wall needed something. I found the little shelf in my stash, added a flower pot and some snippets from real life plastic flowers, and the deed was done.

There are better pictures of the rat cage elsewhere. Its addition made this room a lot more interesting.

And so ends the saga of the Haunted Hangout. Now maybe I can get back to what I thought I'd be doing this summer: the Greenleaf Pierce Bohemian Inn and Tavern.

Before I do that, though, I've promised myself a grand clean out and reorganization of the craft area. I sure hope I can keep my promise, because man, does it ever need it.

Haunted Hangout Finished 3 - Parlor and Game Rooms


The photos of the finished Haunted Hangout appear in four entries.
Haunted Hangout Finished 1 - The Outside & Meet the Skeletons
Haunted Hangout Finished 2 - Outside Details & Attic
Haunted Hangout Finished 3 - Parlor and Game Rooms
Haunted Hangout Finished 4 - Reading and Pet Rooms

The skeletons are missing from these photos as they block out much of the detail in the rooms.

In the parlor, a large mirror over the sofa was added. I wonder about those little potion jars on the table. Are they meant to, uhhh, spice up the coffee?

Have you noticed the lack of electricity? Candles and oil lamps are in use throughout.

There's a shotgun over the door in the game room. I guess even skeletons need to have some kind of home defense at hand. The skirt on the table hides the cord from the ghost lights. It comes in through the window and pokes down through the floor. A little bit of it shows in the corner of the picture. The table skirt doubles as a hide-out for one of the house pets.

This skeleton is the only one who is not removable. It was easier to glue him in place than fiddle with posing him each time he moved.

I like this wall decoration. I sawed the back off of a plastic skull, glued two waste bits from Greenleaf Orchid window punch outs on a black backing, painted it and added the feathers. (No skeletons were harmed in the making of this item.) The feathers came with the dots.


Haunted Hangout Finished 2 - Outside Details & Attic


The photos of the finished Haunted Hangout appear in four entries.
Haunted Hangout Finished 1 - The Outside & Meet the Skeletons
Haunted Hangout Finished 2 - Outside Details & Attic
Haunted Hangout Finished 3 - Parlor and Game Rooms
Haunted Hangout Finished 4 - Reading and Pet Rooms

The little details outside the house and on the porch were fun to do. The bats are happy with their little house.

The ghosts dance and the leaves and moss add color and texture.


The suit of armor guards the door. Is there a skeleton inside? I don't know!

This sad little ghost is from a scrapbooking packet. Hmm ... looks as if a welcome mat might be in order.

 Our friend the smoker skeleton keeps an old chair on the porch.

The pumpkin critter was once an unpainted woodsie meant to become a greenery topiary. I like the spooky edge in this photo.

A bedraggled witch holds court on the roof and a raven keeps a watchful eye while a humongous bat and a wide-eyed owl in the attic wonder why they're awake right now. Strangely, the oversize items on the roof and in the attic don't break the spell when the house is viewed as a whole. I suppose once one's reality is suspended sufficiently to accept a houseful of busy skeletons, anything is possible.


While we're in the attic, check out the trunk full of Lemax wiggly snakes, the ginormous skull in the window, and the very large rat.