You all know about the standard definition of dry fit: putting the house together with tape so fittings can be adjusted before committing to glue. Well, the electrical system has provided two more definitions: 1) giving the electrician fits and 2) pre-planning the tape runs'
First, about the electrician's fits. This house will use a new-to-me system for delivering electricity to the house. I learned about it in a YouTube video, How to Electrify a Dollhouse by Dollhouses, Trains & More, which was shared by a Greenleaf Forum colleague. They use a direct power system devised by Creative Reproductions 2 Scale. I went on line several weeks ago and ordered the supplies I thought I'd need, including two different power connectors. The video is wonderful, except ... it shows a Mini Power Connector being attached to the tape wire using two wires, one red, one black.

 |
| This is the Mini Power Connector. The cord from the power source goes into one end and the red and black wires that connect to the tape wire come out the other end. |
I phoned Carl Sahlberg, the inventor, to find out what kind of wire I'd need, but he didn't answer. I went off to Walmart, thinking I could find a lamp repair kit. Nothing. But I did get a call back from Carl, who told me I needed Kynar hookup wire, 28 AWG. Hookup wire -- who knew that was a thing? He sells it on his website, but I couldn't see spending about $16 for two 50-foot spools, one red and one black, when all I'd need was about four inches of each. He asked what I was trying to accomplish, then told me the Power Connector comes with a couple of brass screws that can connect with the tape wire -- no hookup wire needed. The light came on! I'd ordered two power connectors, the Mini Power Connector (above) and a Power Connector with Fuse, as I was not sure exactly what I'd need for the project. The latter is the one that connects to the tape wire and is the one I should have been using. As I was following the video, I'd left it in the box.
 |
| These are the components finally assembled. See the Power Connector with its screws, one to hold it to the house and two to connect to the tape wire. It also has double sticky tape on the back. This Power Connector with Fuse has a Mini Connector as part of the device so it can be used with round wire as well as tape wire. The Bambam is a device with a strong spring in the center. Stretch it and let go, and "bam! bam!" the eyelet is slammed home. Am looking forward to trying it out on some scrap before I use it in the house. It is rated very highly on line. |
Once all supplies were assembled, all of the light fixtures were placed back in the house.
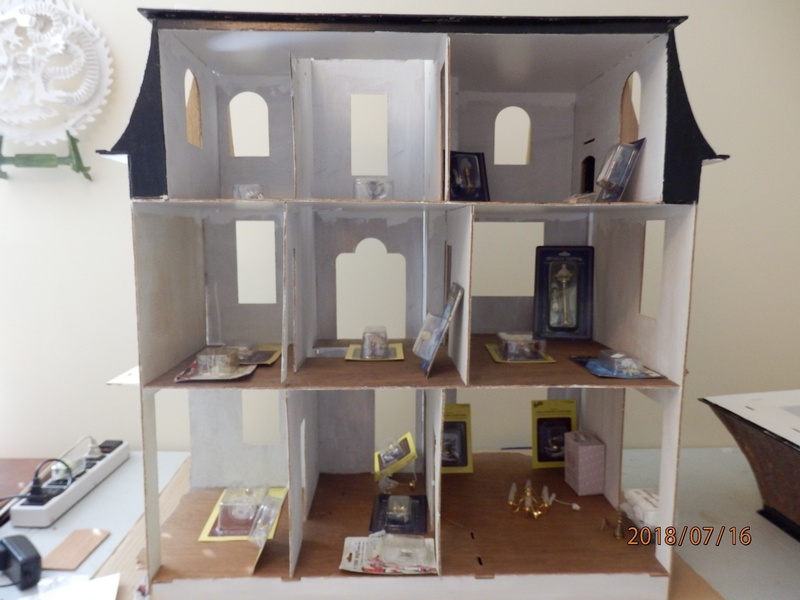 |
| The light fixtures are staged near where they will go preparatory to establishing the tape runs. |
 |
| The blue painter's tape is sketching out where the tape wire will go. It was a challenge to find the shortest runs with the fewest connections. The little white circles indicate where a fixture will be attached to the tape wire. The circles on the floor will be the connections for the ceiling lights in the floor below. In some of the 90-degree turns the tape can be folded rather than pieced with eyelets. |
There are two unsettled electrical items. The hanging light in the room top left is a bit of a puzzle. Going through the ceiling means going through the roof, which I'd rather not do. I may have to put in a faux ceiling in this room, which I'm envisioning as the maid's room. There will be an antique Tiffany lamp on a table in a small bay in the living room. I'm not sure how that will be resolved. A wall outlet? Drill a hole in the table and run the wire down through it?
The next step will be to put the furniture back into the house to verify that the intended outlets and connections are in the right place. I want to know exactly where the tape wire needs to go before I get started installing it.
No comments:
Post a Comment