Brace yourself! I figured out how to slide the ground floor staircase past the dining room door trim. A few more tweaks needed -- when are they not? -- but the concept works.
 |
| See the filler strip to the left of the unit. It is wide enough to permit the unit to slide past the trim on the doorway at left. The newel post on the landing needs to be reset. Somehow it got out of square, but even more important is that it needs to move closer to the wall. Not sure yet if it will dangle off the edge of the original landing or better yet, be glued to the wall. In the latter case, the baluster (or two) and handrail will be attached to the unit, and the handrail will butt up against the glued post. The right side, up near the ceiling, was trimmed a corresponding amount. The upper corner was cut to accommodate the crown moulding. The frame of the front door will have to be adjusted to accommodate the first step, which has moved forward, but that is so far back that when everything is in place, it won't be noticeable. |
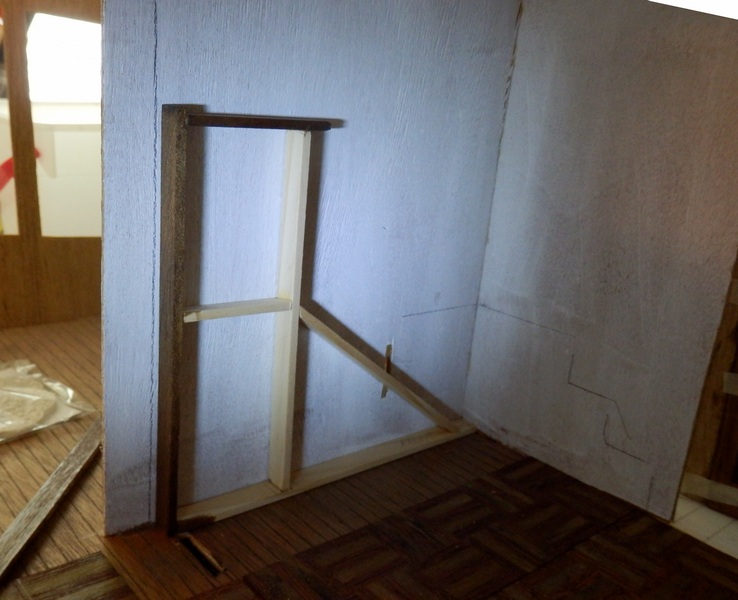 |
| The gap is filled with the top board on this wall bracket. The bracket will be glued against the wall. The board at the base acts as a guide, so the stair unit will slide straight in. No wobble. |
 |
| If the balusters and railing are glued to the base unit, there won't be room for any kind of ceiling light. If the balusters and railing are part of a separate unit that drops in from the middle floor, a ceiling light would be possible. My keep-it-simple solution would be one or two wall sconces along the right/living room wall. Between the two doors would light the under-stairs area. If I can find or make a sconce that sticks out less than 3/8" deep, it could go on the left wall, between the dining room doorway and the front edge. Even a small lamp or candle could be glued to the wall while a table beneath it remains removable. |
I need to get some satin white paint and paint all of the ceilings before I can think about installing any tape wire, but I think it would be useful to stage the lighting and mark the tape routes with a pencil or marker, as with wall, table and ceiling lights, the electrical schematic
Lagniappe: while waiting for glue to dry, the pile of strip wood and mouldings began to annoy me. It was all heaped on a table and difficult to pull out the pieces I needed. I went out into the garage to look for a suitable container and found the milk crates.
 |
| This works well for the moment. I've marked the contents on the ends of the boxes. The loose pieces are easily identifiable. Short pieces can be rubber-banded with their full size brethren for the loose items. |
Methodical, creative and organized, too! In another year or two the Beacon Hill will be finished! NJ
ReplyDelete